
How to set up a white label chatbot platform as an admin
A practical WL-admin workflow from the first platform check to a safely restricted test customer, verified customer view and exact cleanup.
A white label chatbot platform needs more than a logo: domain, sender identity, client quotas, model access and dashboard permissions must work together.
A white-label administrator runs one branded organization. This role is different from a WebChatAgent superadmin and from an end customer: it may manage only its own organization, customers, pooled limits, branding and sender configuration. The server keeps that tenant boundary authoritative even when the menu hides an unavailable action.
The setup order matters. Confirm plan and pool first, connect and verify the customer-facing domain, apply approved branding and legal links, configure your own SMTP, then create one disposable customer. Only after that should you allocate resources, restrict dashboard areas and inspect the customer view.
The verified local example uses the fictional brand Northstar AI Studio, the reserved addresses support@example.com and wl-client-tutorial@example.com, WebChatAgent blue #029cf5 and one disposable 14-day TEST customer. One continuous English Light Mode run proved the local admin UI, saved branding, customer lifecycle, quotas, provider restriction and allowed/denied routes, then removed every tutorial user, organization, bot, dependent row and upload.
Privacy-protected two-click player
White-Label Chatbot Platform Setup: Domain, Brand & Clients
Set up a white label chatbot platform as an admin: configure domain, branding, SMTP, client accounts, quotas, permissions and verified cleanup.
The YouTube player stays blocked until you choose Play. Loading it connects your browser to YouTube and may transfer technical data to Google.
Open directly on YouTubeWhat you will have at the end
- A documented WL-admin role and tenant boundary
- A verified plan, shared resource pool and non-billing setup path
- A customer-facing domain and DNS production checklist with an explicit local-evidence boundary
- Approved platform branding, legal email links and sender configuration
- One isolated TEST customer with explicit quotas, providers and dashboard permissions
- A customer-view proof plus disable, deletion and restoration evidence
Before you start
- An account whose database-backed role is admin and whose organization type is whitelabel
- Authority over the organization brand, customer accounts and resource allocations
- DNS access for a dedicated subdomain controlled by the organization
- Approved light and dark logos, favicon, primary color, platform name and support address
- Published imprint and privacy-policy URLs for branded email footers
- A dedicated non-production SMTP service and controlled recipient if email delivery will be tested
- A cleanup owner and no real customer data in any tutorial field
Brand shell → delivery identity → customer boundary
The domain and branding define what customers see. SMTP defines which infrastructure sends account mail. Customer quotas, model providers and permissions define what one customer may consume and open. Treat these as three separate controls and verify each from the customer side.
A green save message proves only persistence. DNS needs an independent verification result, SMTP needs a connection or controlled delivery test, and customer access needs an impersonated or separate-session check. Paid plan, add-on and voice changes are billing actions and stay outside a reusable tutorial capture.
01–12
Set it up step by step
Confirm the WL-admin role and safe navigation
Start by proving which organization and role you are operating.
Sign in as the dedicated WL administrator and open Account from the header. The account must resolve to role admin inside an organization whose type is whitelabel. The sidebar then shows the organization-scoped Admin section with Users; it must not expose platform-wide Organizations, Costs, Revenue or other superadmin routes.
Record the organization name, account identity and current host without showing a password, session token or SMTP secret. If the expected status, Branding card, SMTP card or Users link is absent, stop. Do not continue under a normal user, team member or platform superadmin.
- Required role: admin
- Required organization type: whitelabel
- Core routes: /settings/account, /account/whitelabel/setup and /settings/users
Review plan, domain and shared capacity
Read the operating boundary before allocating anything.
At the top of Account Settings, read the current plan, chatbot pool, messages per month, training-data characters and domain verification badge. The first number is live organization-wide usage; the second is available capacity. Users later receive personal caps from this pool.
You may open add-on, plan and voice dialogs to explain available choices, but do not accept terms, select Buy now, change a paid quantity, cancel a tier or open the Stripe portal during the reusable capture. A billing preview is not a test purchase.
- Usage is not the same as distributed quota.
- An empty personal cap means shared pool behavior.
- Every paid change requires separate commercial approval.
Choose a controlled customer-facing subdomain
Use a domain your organization owns and can change safely.
Open Set up whitelabel and enter only the approved host name, without https://, a path or trailing slash. This tutorial uses northstar-wl-tutorial.test, a reserved local-only value that cannot prove domain ownership, public routing or certificate readiness. Replace it with a dedicated organization-controlled subdomain only in the separate production rollout.
Changing the domain clears its previous verification. Confirm the intended host with the DNS owner, identity owner and support team before saving. Do not reuse a production login domain for a tutorial or point an apex domain without a reviewed DNS and mail-impact plan.
- Use a dedicated subdomain.
- Never invent ownership of a domain.
- Saving a new host deliberately resets verification.
Read the DNS instructions and verify production separately
The local badge demonstrates UI state; only an external production check proves DNS and HTTPS.
The setup page displays the production workflow: copy the exact record type, name, target and TTL to the organization’s DNS provider. CNAME is the recommended option; use an offered A-record fallback only after the DNS owner reviews the operational trade-off. No DNS record was created or queried during this reusable local run.
The green state in the screenshot was seeded locally to explain the interface. For production, wait for propagation, select Check DNS now, require DNS correct and Verified, then open the HTTPS tenant URL in a clean browser and confirm certificate, host and branded login. None of those external DNS or HTTPS checks is claimed by this tutorial evidence.
- Record the exact type, name, target and TTL.
- Verify HTTPS in addition to the dashboard badge.
- DNS propagation may require another check later.
Apply approved branding and legal links
Configure the full identity, not only a logo.
In Branding & whitelabel, set the fictional platform name Northstar AI Studio, support@example.com, primary color #029cf5, “Powered by Northstar AI Studio”, https://example.com, a fictional footer and the reserved imprint and privacy paths under example.com. Upload the approved TEST logo and favicon; the real organization must use its own reviewed assets and legal pages.
Save once and allow the application reload. Check that no field is clipped and that image proportions are preserved. The primary color generates the interface color scale, while email footer links are separate from the SMTP sender name and address.
- Platform name: Northstar AI Studio
- Primary color: #029cf5
- Tutorial addresses and URLs use reserved example.com values only.
- Preserve both the uploaded test mark and the WebChatAgent video lockup without distortion.
Verify the branded dashboard shell
The local dashboard proves persistence; the customer host still needs a separate production check.
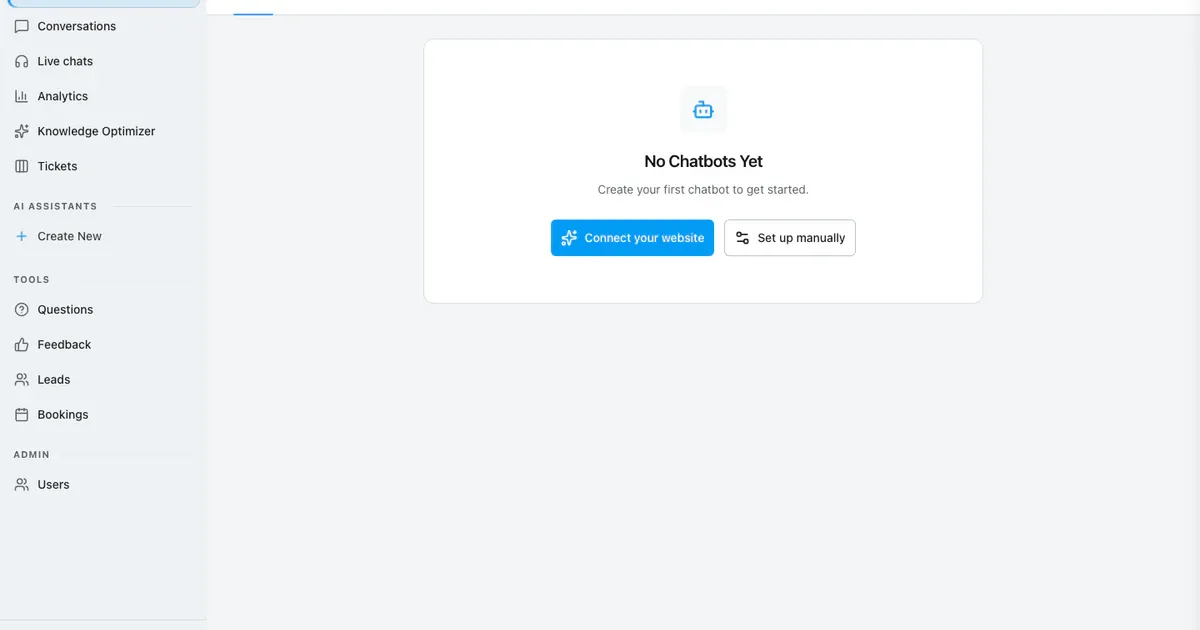
Open Dashboard after saving. Confirm the Northstar logo, the Welcome back, Northstar heading, the real No Chatbots Yet card, the organization name in the browser title and the saved blue theme. This view is deliberately different from Account Settings, so it proves that the persisted branding reaches another product route.
For the production launch, open the verified tenant domain in a separate clean session. Check the favicon, certificate, login page, blue focus and button treatment, account links and customer-facing support contact. Inspect desktop and a narrow viewport without changing to Dark Mode.
- Verify the dashboard route locally, then the live host separately.
- Check logo geometry and keyboard focus.
- Keep English and Light Mode throughout the public capture.
Configure your own SMTP without exposing credentials
White-label invitations must never fall back to the platform identity.
Load Email / SMTP before entering anything. Use the organization’s approved non-production host, port, SSL mode, username, password, sender name and sender address. The password must come from a secret store and remain absent from screenshots, narration, logs, source files and manifests. Leaving the password empty keeps an already stored secret.
Save only after the current configuration loaded successfully. Test connection may contact the SMTP server, so run it only against the approved sandbox. For a delivery proof, invite only a controlled inbox after connection passes. The server refuses white-label mail without usable own SMTP to prevent a WebChatAgent sender leak; a failed test blocks the invitation step.
- Never show the SMTP password.
- Port 587 normally uses STARTTLS; port 465 uses the SSL switch.
- A connection test does not prove inbox delivery.
Open Users and understand shared versus personal limits
Allocate from evidence, not by dividing every pool equally.
Open Admin → Users. The organization pool cards show live used capacity and the amount already distributed. The customer table then shows account status, actual chatbot count, personal allocations, allowed internal model providers and last activity.
Leave a resource empty when the customer should draw from the shared organization pool. Enter a number only when the contract or risk policy needs a personal cap. Messages, indexed content and storage used by TEST customers still consume package resources even though their bots do not consume paid bot slots.
- Used: measured consumption.
- Distributed: explicit personal caps.
- Actual chatbots: current customer-owned bot count.
Create one direct 14-day TEST customer
Avoid email side effects while proving the customer lifecycle.
Choose Create directly, not Invite user. Enter Northstar Demo Client and wl-client-tutorial@example.com, supply the password only from the protected capture environment and enable Test account. Direct creation sends no email, creates a plain user and adds the 14-day auto-delete marker.
Require exactly one new row with the Test badge and expiry text. Record the new user ID outside the public artifact for exact cleanup. Never use a customer, colleague or reachable address, and never read the password aloud or type it while a zoomed crop could expose it.
- Name: Northstar Demo Client
- Email: wl-client-tutorial@example.com
- Test account: enabled
- Email sent: no
Allocate quota, providers and dashboard permissions
Use one small, explainable customer contract.
Edit only the new TEST row. Allocate 1 chatbot, 2,000 messages per month and 500,000 training characters. Restrict internal providers to Google Vertex (EU). Turn on restricted dashboard access and grant Chatbots, Conversations and Analytics. Mark Leads as a locked preview; leave Live Chat, Feedback, Questions, Bookings, Tickets and Calls hidden.
Save and reopen the customer to confirm persistence. A teaser is not access: it shows a blurred feature preview and the organization contact route. Tightening the customer restriction also clamps that customer’s team-member permissions; lifting the restriction later does not automatically restore removed rights.
- 1 chatbot · 2,000 messages · 500,000 characters
- Allowed provider: Google Vertex (EU)
- Granted: Chatbots, Conversations, Analytics
- Teaser: Leads; all other listed areas hidden
Impersonate the TEST customer and prove the boundary
Verify what works, what is teased and what stays hidden.
Use Log in as this user on the active TEST row. The orange impersonation banner must identify wl-client-tutorial@example.com. Create one assistant named Northstar Client Test and verify that Chatbots, Conversations and Analytics open. Confirm the customer can select only Google Vertex (EU).
Open Leads and require the locked preview instead of live data. Try a direct Bookings URL and require a return to Dashboard without protected content. The customer must not see Admin → Users, Account white-label status, Branding, SMTP, plan purchase or another customer’s assistants. Record allowed and denied results separately.
- Allowed: own chatbot, Conversations, Analytics
- Teaser only: Leads
- Hidden or denied: Bookings, WL administration and other tenants
- Impersonation banner must stay visible until exit.
Return, revoke the TEST account and restore every change
Finish with proof that the reusable run left no customer or brand residue.
Exit impersonation through the orange banner and require the WL admin to return to /settings/users. Disable the exact TEST user and verify its active session loses authenticated access. Re-enable only long enough to finish a planned check; otherwise continue directly to permanent deletion.
Delete wl-client-tutorial@example.com and confirm the warning that its assistant and data are removed. Query the organization inventory again and require the user, Northstar Client Test bot and dependent records to be absent. Restore the saved branding snapshot, remove uploaded TEST logo files, restore or clear any tutorial domain, leave SMTP untouched unless a dedicated sandbox snapshot was changed, and verify no checkout, invitation or external customer mail occurred.
- Exact user, bot and dependent-data deletion
- Exact branding/domain restoration
- No paid transaction, invitation or production email
- Final database and filesystem inventory: zero tutorial residue
Example & result
See the practical test and its result
Every tutorial includes a fixed input, the expected outcome and a transparent record of what was actually verified locally.
Practical example: White-label platform admin guide: domain, branding, SMTP and client access
This exact scenario was completed with the temporary tutorial account.
Exact test input
Create Northstar Demo Client as wl-client-tutorial@example.com with the 14-day TEST option. Allocate 1 chatbot, 2,000 messages, 500,000 characters and Google Vertex (EU); grant Chatbots, Conversations and Analytics, show Leads as a teaser and hide the remaining customer areas.
Expected result
The customer can create one Vertex-backed assistant and open only the granted areas. Leads shows a locked preview, a direct Bookings URL exposes no protected content, and the exact TEST customer, assistant, uploads and dependent data are absent after cleanup.
What was actually verified
The isolated English Light Mode run created the direct TEST customer, stored the stated limits and Vertex-only provider rule, proved Chatbots, Conversations and Analytics, showed the locked Leads preview, denied Bookings by direct URL, rejected the disabled login and deleted the customer. Final inventory found exactly 0 users, organizations, chatbots, dependent rows and uploads. Reserved .test/example values demonstrate the UI only; public DNS, tenant HTTPS and SMTP delivery were not externally tested.
Tips & tricks
Make the setup reliable
Test with realistic examples, record your baseline and change one setting at a time. That makes real improvements visible.
Separate branding from sender identity
A logo and color do not configure email delivery. Treat SMTP host, sender address, authentication, footer and legal links as a separate reviewed release.
Use direct TEST creation before invitation delivery
Direct creation proves quotas and permissions without sending mail. Test invitation delivery later with a controlled inbox after own SMTP passes.
Allocate a contract, not a guess
Write the customer’s bot, message, content and provider limits before editing the row. Compare distributed totals with the organization pool after every change.
Verify restrictions from the customer session
A saved permission object is not enough. Verify allowed navigation, one teaser, a hidden direct URL and absence of every WL-admin surface.
When something does not work
Troubleshooting
Check status, permissions and test data systematically before changing the model or prompt.
The custom domain remains unverified
Compare the exact host, record type, target and TTL with the setup page. Remove conflicting records, wait for propagation and check again; do not claim the tenant URL is live while the badge is pending.
SMTP test fails or invitations do not send
Verify host, port, SSL mode, username, stored-password state and allowed sender. Test the sandbox connection first. White-label mail is intentionally refused without a usable own SMTP transport.
The customer sees too much or too little
Reopen the exact user row and distinguish true, teaser and hidden values. Exit and start a fresh impersonation session, then test both navigation and direct URLs. Do not assume a hidden menu is a server denial.
Cleanup leaves a bot, upload or dependent row
Stop publication. Preserve IDs, run the exact user purge, remove the organization branding-upload directory, restore domain and branding snapshots and repeat the read-only inventory until every tutorial-specific result is zero.
Ready for a production-style test
The isolated run provides twelve unique 1440 × 1000 English Light Mode frames, one continuous public screencast, the direct TEST-customer lifecycle, exact quotas/providers/permissions, allowed and denied customer views, disable/login-denial/delete evidence and five verified zero-residue counts. Before a real launch, separately verify public DNS, tenant-host HTTPS, SMTP connection and controlled mailbox delivery.