
Zapier MCP Integration
Connect WebChatAgent to 8,000+ apps via the Zapier MCP server. Let your assistant trigger and consume no-code automations across your stack – Gmail, Slack, HubSpot, Notion, Airtable, Sheets and many more.
8,000+ apps, one MCP server
Expose any Zap as a tool your AI assistant can call. Bi-directional, secure and manageable from a single place – the Zapier MCP server.
What you can do
Trigger workflows, push data and orchestrate apps – all from a single conversation.
Trigger emails & tasks
Send emails, create tasks, update rows, post to Slack and create CRM contacts directly from the chat.
Bi-directional
Your assistant can trigger Zaps and consume Zap outputs as conversation context.
No-code workflows
Invoke any of your existing Zaps via the Zapier MCP server – no developer required.
Reusable automations
Share automations across chatbots and teams without duplicating logic.
Prerequisites
A Zapier account (any plan that supports the actions you need)
WebChatAgent account with at least one chatbot created
Zapier MCP server endpoint and token (see steps below)
Quick start
From zero to a working Zapier MCP integration in four steps.
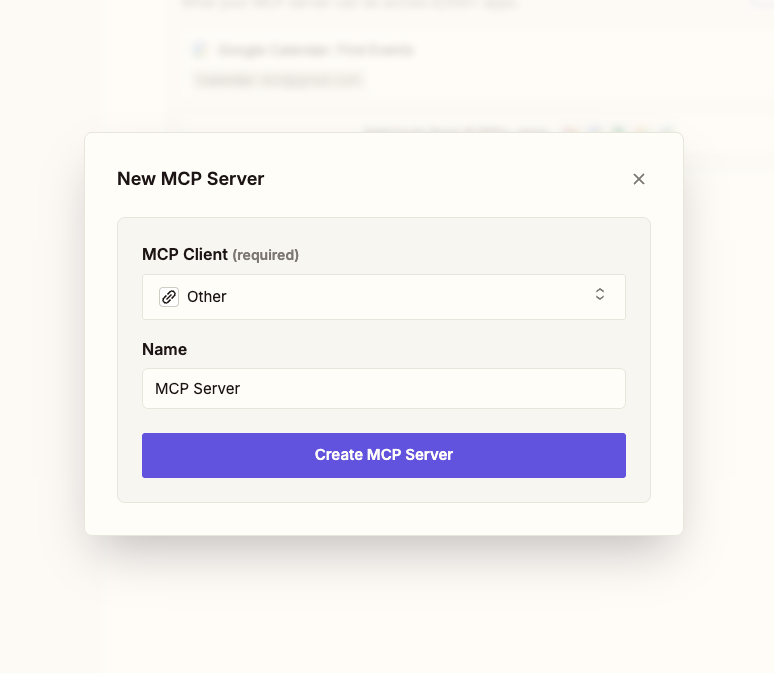
Create or choose a Zap
In Zapier, create a new Zap or select an existing one. Define the trigger and the following action(s).
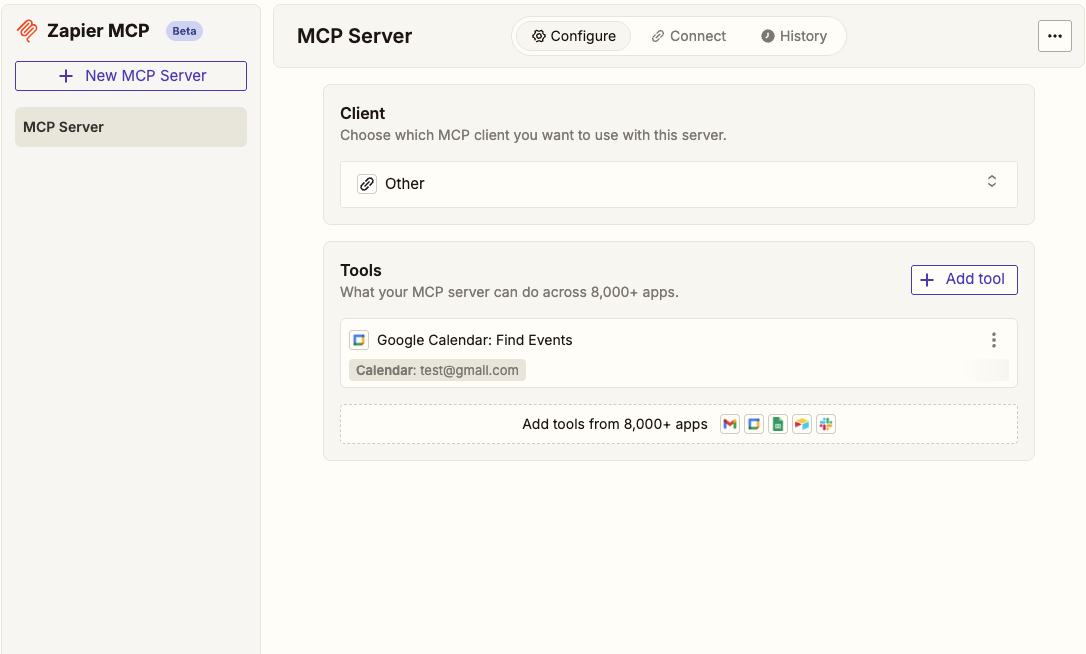
Expose the Zap via the MCP server
Enable the Zapier MCP server for your Zap(s). This provides a secure endpoint for your WebChatAgent to call. See the official info page at zapier.com/mcp and create/manage your MCP server at mcp.zapier.com.
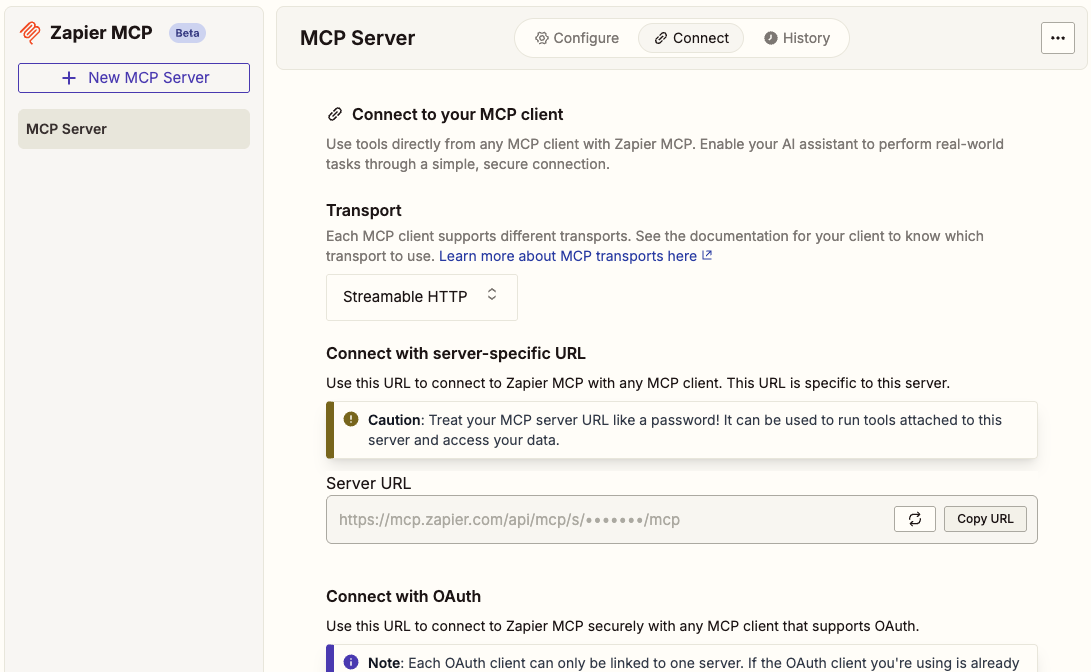
Configure WebChatAgent
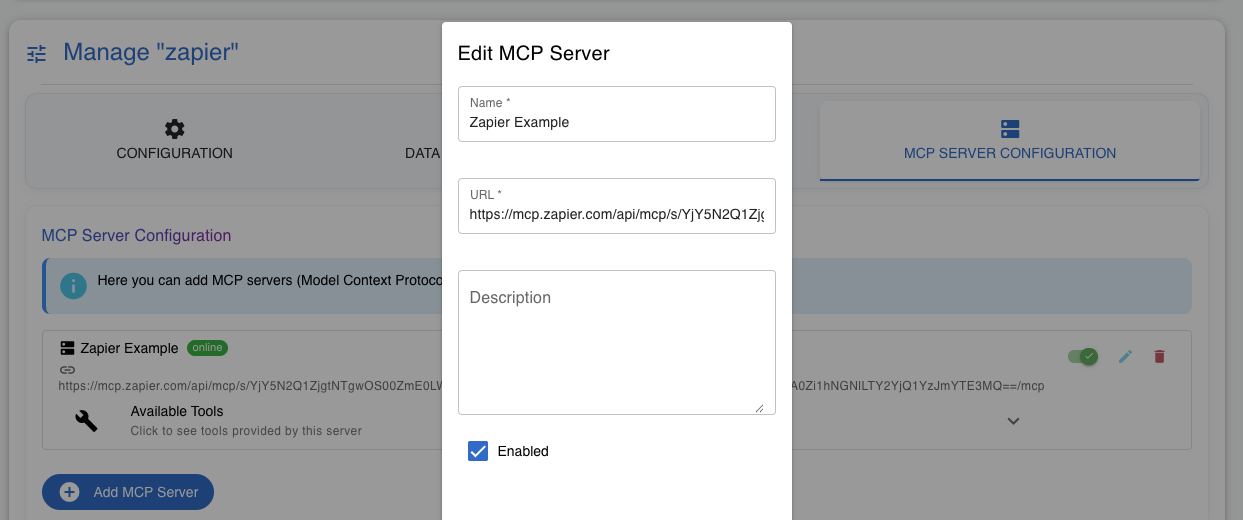
Open your chatbot in the dashboard and add a new MCP server. Paste the Zapier MCP endpoint and token. Save.
Test in the chat
Ask the assistant to perform an action (e.g. "Create a lead in HubSpot"). The agent will decide when to call the Zapier MCP tool and show results.
Configuration in WebChatAgent
Add the MCP server
In your chatbot settings, add a new MCP server and choose a meaningful name like "Zapier". Paste the base URL and your token. Optionally, restrict which tools are available to the agent and add short descriptions so the LLM knows when to use them.
Map outputs to chat
Map outputs from Zaps back to the chat response (e.g. created record IDs or short summaries). For data-sensitive flows, add confirmation steps in the agent prompt to prevent unintended actions.
Security & best practices
Store credentials in environment variables or your hosting platform's secrets area
Use least-privilege tokens for Zapier and rotate them regularly
Add user-facing confirmations for actions with side-effects (e.g. sending emails)
Log tool calls in your dashboard to monitor usage and detect anomalies
Ready? Create your first AI chatbot.
Free to start, no payment details needed. Cancel anytime.
No credit card required. Cancel anytime.