
How to install an AI chatbot in WordPress step by step
A field-by-field WordPress setup with floating and inline placement, exact domain rules, a real test question and practical cache fixes.
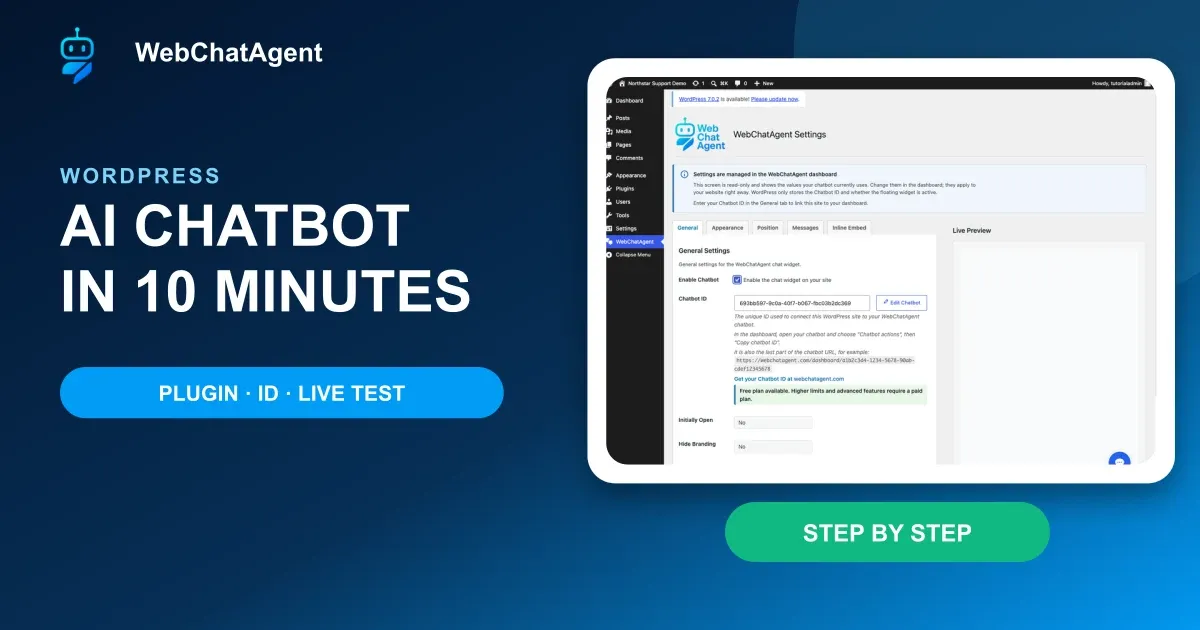
An AI chatbot for WordPress needs more than an activated plugin: the correct assistant, allowed domain, placement and live answer must all be verified.
The WebChatAgent plugin connects WordPress without editing a theme file. WordPress stores only the Chatbot ID and whether the floating widget is enabled. Appearance, knowledge, tools and answer behavior remain in the WebChatAgent dashboard.
This walkthrough uses a disposable local WordPress site named Northstar Support Demo and an English Light Mode WebChatAgent test account. We install plugin version 1.1.3, connect one assistant, publish an inline chat page and verify the result without touching a production site.
Do not treat a visible chat button as the final test. The hostname must be allowed, the correct assistant must answer, and one source-backed question must return the expected fact.
Privacy-protected two-click player
How to Install an AI Chatbot in WordPress (Step by Step)
Install an AI chatbot for WordPress with the official plugin, correct assistant ID, domain permission, inline block or shortcode and a real answer test.
The YouTube player stays blocked until you choose Play. Loading it connects your browser to YouTube and may transfer technical data to Google.
Open directly on YouTubeWhat you will have at the end
- The official plugin installed and active
- The exact WordPress hostname allowed in WebChatAgent
- The correct Chatbot ID saved with the floating widget enabled
- An inline chat page created with the block or shortcode
- A repeatable real-answer and domain-error check
Before you start
- WordPress administrator access
- A WebChatAgent chatbot with one indexed source
- The exact production and staging hostnames
- A source-backed question with a known expected answer
- Permission to clear WordPress, page-builder and CDN caches
One ID connects two places
WebChatAgent owns the assistant configuration. The WordPress plugin injects the scripts and passes the selected Chatbot ID to floating and inline placements.
Allowed websites is the security gate. A correct ID can still show a configuration error or no usable widget when the page hostname is missing.
01–11
Set it up step by step
Find and activate the official plugin
Confirm the plugin name, publisher and version before activation.
In WordPress Admin open Plugins → Add Plugin and search for “WebChatAgent”. Choose AI Chatbot & Live Chat – WebChatAgent by WebChatAgent. Install it from the directory, then select Activate.
The controlled test used version 1.1.3 on WordPress 7.0. A newer compatible version is preferable when the directory offers one; do not upload an unknown ZIP from a third-party download page.
Confirm the active plugin and new menu
WordPress reports activation and adds WebChatAgent to the main menu.
Return to Installed Plugins. The WebChatAgent row must show Deactivate, not Activate, and the green “Plugin activated” notice should appear once. The top-level WebChatAgent menu on the left is the next destination.
If activation fails, check the WordPress and PHP requirements shown in the plugin directory before changing any WebChatAgent setting.
Copy the complete Chatbot ID from the intended assistant
The UUID decides which assistant appears in WordPress.
Open the intended assistant in the English WebChatAgent dashboard. Use Chatbot actions → Copy chatbot ID, or copy the UUID shown in Widget Integration. The ID is also the last segment of the dashboard URL.
Compare the assistant name before copying. The verified example uses Northstar Support; accidentally pasting an ID from a sales bot can look technically successful while producing the wrong answers.
Allow each exact WordPress hostname
Production, www and staging hostnames are separate entries.
In WebChatAgent open Settings and add the exact hostnames under Allowed websites. Enter hostnames without `https://`, port or page path, and press Enter after each one.
For example, `www.northstar-demo.example` does not automatically allow `support.northstar-demo.example`. Add only the hosts that really load the widget. The test deliberately reproduced the plugin’s domain error before the allowed list was correct.
Open the WordPress plugin’s General tab
Only two values are stored locally for the floating widget.
Select WebChatAgent in the WordPress main menu. The General tab explains that WordPress stores the Chatbot ID and the floating-widget switch. The other tabs mirror read-only values from the dashboard.
Before connecting, the page shows a link to create or open a WebChatAgent account and a preview area. Keep the WebChatAgent dashboard open in another tab so the assistant name and ID stay easy to compare.
Paste the ID and enable the floating widget
Save one complete UUID without spaces.
Paste the copied UUID into Chatbot ID, enable “Enable the chat widget on your site” and select Save Settings. The switch controls only the floating button; inline embeds work independently.
Do not type an ID from a screenshot. Copy it directly, then compare the first and last four characters before saving.
Read the saved state—and trust the error message
Saved locally does not mean authorized by WebChatAgent.
A green “Settings saved successfully” notice proves only that WordPress stored the values. When the chatbot configuration cannot be loaded, the same screen says to verify Allowed Domains and Chatbot ID.
This is a useful controlled failure. Re-check the exact hostname, `www` or staging subdomain, and the complete UUID. Save in WebChatAgent first, then reload WordPress. Do not disable the domain restriction to hide the problem.
Choose Gutenberg block or shortcode for inline chat
Both reuse the saved ID unless a page-specific override is set.
Open the Inline Embed tab. Use the WebChatAgent Inline Chat block in Gutenberg, or `[webchatagent_inline]` in the Classic Editor, a shortcode block, page builder or text widget.
A page-specific bot is possible with `[webchatagent_inline chatbot-id="OTHER_UUID"]`. Document overrides carefully because they can explain why the inline chat and floating button show different assistants.
Add the inline chat to a real page
The example page uses a standard Shortcode block.
Create a page called “Ask Northstar Support”, add the WordPress Shortcode block and paste `[webchatagent_inline]`. With the native WebChatAgent block, search for “WebChatAgent Inline Chat” and leave the optional ID empty to reuse General settings.
Keep enough vertical space around the embed and check the editor’s tablet and mobile previews before publishing.
Publish and record the exact test URL
A published page gives you one repeatable browser target.
Select Publish, review visibility and URL, then confirm Publish. Open the final public URL in a private window so administrator cookies and stale widget state cannot mask a problem.
For staging, keep the page out of search results and remove it after acceptance. The local tutorial page contained only fictional Northstar data.
Verify placement, assistant identity and one real answer
Test the complete visitor experience, not only script loading.
The published page displays the inline chat in the content and the floating Open chat button at the lower right. If you want only one placement, disable the floating switch or remove the inline block.
Exact test input: “What is the internal escalation code for an urgent service incident?” Expected and observed result: `NORDSTERN-42`. The verified 1440 × 1000 frame shows the real source-backed reply in the disposable WordPress site after the exact local hostname was allowed.
If the widget is missing, clear WordPress, page-builder and CDN caches. Exclude `web-chat-agent.js` and, for inline pages, `chat-widget-inline.js` from delay/defer or script-combining rules, then retest in a fresh private window.
Example & result
See the practical test and its result
Every tutorial includes a fixed input, the expected outcome and a transparent record of what was actually verified locally.
Practical example: Install the WebChatAgent AI chatbot in WordPress: complete beginner guide
This exact scenario was completed with the temporary tutorial account.
Exact test input
Open the WordPress sample page and ask: “What is the internal escalation code for an urgent service incident?”
Expected result
The widget loads once, opens correctly and returns the indexed PDF value.
What was actually verified
The disposable WordPress page loaded the inline and floating placements. The real inline widget answered: “The support verification code is NORDSTERN-42.”
Tips & tricks
Make the setup reliable
Test with realistic examples, record your baseline and change one setting at a time. That makes real improvements visible.
Treat hostnames as exact security entries
Add production, www and required staging hosts separately. Remove disposable hosts after acceptance.
Choose the model before WordPress QA
Use the fastest economical model that passes the same known-answer and honest-unknown tests. WordPress does not change model quality.
Retest after every source update
Remove duplicate pages and outdated PDFs, re-index, then repeat the same evaluation questions on the public WordPress page.
When something does not work
Troubleshooting
Check status, permissions and test data systematically before changing the model or prompt.
The expected option is missing
Confirm the account plan, feature permissions and selected chatbot. Paid or beta features can be hidden when prerequisites are not met.
The test result is inconsistent
Reset the test conversation, keep the input identical and change one setting at a time so the cause remains measurable.
Ready for a production-style test
Repeat the answer test on the homepage, one cached inner page and a mobile viewport. Confirm the intended placements, consent behavior and assistant identity before launch.